

Since Covid-19 and the numerous lockdowns that followed, many musicians resorted to making music from their home studios to stay creative and keep busy. As The Economist stated, “the pandemic has brought about a home-studio boom” and although this may sound incredibly daunting to some, it doesn’t need to be. So, if you’ve been wondering how you can make the most of your musical skills from your own home in 2022 and beyond, here’s some basic info to help.
Step 1: Prepare
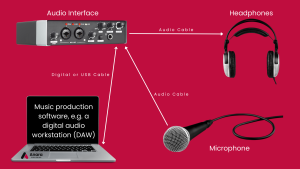
Just like the old saying goes, ‘fail to prepare and prepare to fail’. Here’s some essential equipment to think about BEFORE you step in that homemade vocal booth and start singing:
- Audio Interface
- Headphones
- Music Production Software (Digital Audio Workstation/DAW)
- Microphone
Step 2: Choose Your Microphone
Remember, expensive doesn’t always mean better, and it’s good to make an informed decision with regards to microphone purchases. Think about what you need to use the microphone for… Singing? Rapping? Podcasts? It’s also essential to know the basic differences between a dynamic microphone and a condenser microphone. Put simply, a dynamic microphone works best when capturing loud, strong sounds, for example, drums or loud vocals (this type of microphone is typically used in a live environment). In comparison, a condenser microphone is used to capture more delicate sounds and higher frequencies (for example, when recording in a music studio).

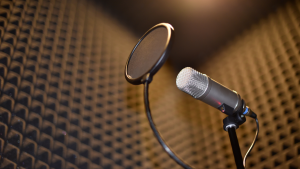
Step 3: Is Your Recording Room Suitable?
The recording environment is just as crucial as the equipment that you use. Consider the positioning of your equipment, room furnishings and background noise. All of the items within your recording room will affect how sound waves bounce back to the microphone. These reflections can create delays, unwanted reverb, and many other issues when recording. To prevent these issues, some people lay down soft furnishings like a rug to dampen reflections and minimize potential noise. You can also cover windows and hard surfaces with duvets and blankets to creative a protective barrier around your studio setup.
Step 4: Technique & Performance
These areas come down to personal preference, but things to consider include:
- Mic positioning
- Distance from singer to microphone
- Lyric meaning – make sure you capture emotive takes and think of the lyrical content when performing!
- Planning – this is essential so you can work smart and make the most of your time! Will you be recording the vocals from start to finish in one take? Will you record each section separately? (For example: Verse 1, Chorus, Bridge).
So that’s the basics to help get you started with recording from home. Post recording, there’s many other things to consider like compression, EQ, panning, timing, and pitch correction but we’ll discuss that more in a future blog! If you have any questions or want to share your own hints and tips on recording from home, head over to our Anara Publishing Instagram page!